Hyper LED Saddlebag Lights: Safety and Style Upgrade
What could be better than making it both safer for you to ride your Harley Davidson motorcycle, as well as giving your bike a cool, new lighting feature at the same time? If you’re thinking of our new Hyper LED Saddlebag Lights, you’d be correct. These saddlebag lights are bright and function as your running lights, braking lights, and turn signals. The amber color of the lights goes with just about any color bike you have and they’re no problem to install yourself.
What are Hyper LED saddlebag lights?
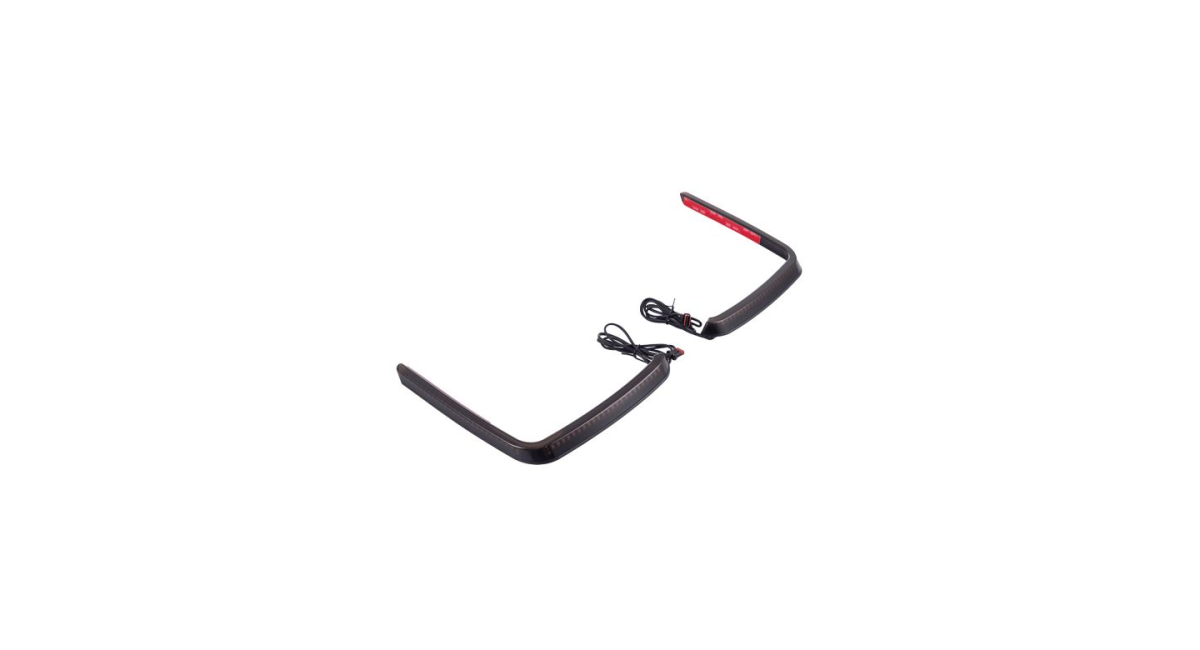
These lights mount around the rim of your saddlebags (NOT the cover) on both sides and provide a much larger lighting footprint for your bike. There are 96 LED chips total and they come in a low profile, L-shaped design, which wraps around the back of your saddlebags to the sides. This allows other motorists and riders to see you better from behind and from the side.
Hyper LED saddlebag lights for Harley Davidson’s are always on for running lights, brighten up when you brake, and the sequential turn signal illuminates each LED to definitively indicate to other drivers which direction you’re wanting to turn. Even from the side, the turn signal is highly visible.
These lights are waterproof, have a low power draw, and a simple plug-n-play installation. They have reflective, polycarbonate lenses and will last you pretty much as long as you own your bike. And again, they look awesome.
Do I need Hyper LED saddlebag lights for my Harley Davidson?
Of course your bike comes with all the lights you need to be safe and compliant on the road. But we all know the stock lights Harley uses are not that great. It’s almost like they’re telling you to upgrade your headlights (from incandescent to LED) and the other lights on your bike.
What our Hyper LED saddlebag lights do is increase your visibility when you’re riding, which makes a big difference especially in the dark or if the weather turns south. You can ride more confidently knowing you’re more likely to be seen by others on the road. The lights also provide visibility on the edge of your saddlebag, which might help prevent someone getting too close.
How hard is it to install Hyper LED saddlebag lights?
These saddlebag lights are easy to install. They come with everything you need, including the wire harness, plastic mounts, zip ties, and alcohol wipes to get the surface clean. Bear in mind before you start that you’ll need to remove the saddlebags in order to do this properly. Not a big deal but plan ahead.
The first thing to do is to get the seat off and test the lights before you install them. You’re going to have to pull the seat off anyway, so this is a good place to start. Once you remove the seat, you’ll see a gray plug and a black plug. You want the black plug. Disconnect it and daisy-chain in the wire harness that comes with the LED saddlebag light kit. This will give you power to the wires for your new LED lights. Simply plug the left into the left LED light and the right into the right LED light. DO NOT put the lights on your bike yet. You’re just testing them now. Fire up your bike, and check to see that the lights are working. Once you confirm the lights are working, disconnect them, and get started on the full installation.
You’re going to stick the LED lights to the upper outside corner of each of your saddlebags. Before you do this, the installation kit comes with alcohol wipes to clean the surface of your saddlebag where you’re mounting the lights. Once you’ve cleaned the area real good, it’s time to mount the lights.
Both LED lights are L-shape to wrap around the corner of the saddlebag. You’ll notice there’s double-sided 3M tape already attached to the lights. Remove the outer layer and carefully attach the lights to your saddlebag. Don’t stick them right up against the lid. Leave about 1/8” so the lid continues to latch properly. Once the lights are attached, remove the saddlebag and put it on your soft table or a movers blanket to do the rest of the installation.
The kit comes with little black plastic squares that stick to the inside of the saddlebag. This is where the zip ties mount to keep the wiring in place. There are four of these squares for each side. Again, clean the surface of the saddlebag where you’re mounting these squares to ensure they stick properly.
Once you have the square pieces in place, run the zip tie through each of the square pieces. It’s obvious where they go. Run the wiring through and pull the zip ties tight. Make sure not to run the wiring over any bolt holes so you can reinstall the saddlebag correctly. Repeat this process with the other saddlebag and put them both back on your bike.
Once the saddlebags are back on your bike, run the wires under the seat and reconnect them to left and right plugs. As far as orientation is concerned, it’s right/left as you ‘re sitting on the bike. The right side is the brake side, and the left side is the clutch side. Go ahead and give it a test. If one or both of the lights aren’t working AND you absolutely had them working in your initial test, then it’s a loose connection, more than likely. Just go back and make sure you’ve pushed the wiring harness plugs in properly, and you should be good to go. If you run into trouble, take a look at Steve the service tech’s video.
When you get these Hyper LED saddlebag lights installed, we think you’ll agree that these are the coolest lights on the market and only Advanblack has this super bright, super thin kind of look. Get some for yourself, exclusively at Advanblack!