
How do you line a Harley Saddlebag?
How do you line a Harley Saddlebag?
If you own a Harley Davidson motorcycle, more than likely it came with saddlebags. All Touring models and a couple of other models come standard with saddlebags. Or you may have purchased new saddlebags. Advanblack has stretched saddlebag bottoms for just about any Touring model you have, including CVO-style tapered bags (2014+). We also have non-stretched saddlebags for 2014+. We also have liners for Tour Packs, including razors and chop. No matter what, if you have a saddlebag or pack that isn’t lined, you’ve probably given it some thought.
Do I need a liner for my saddlebag?
Regardless if you have the OEM or a new saddlebag that doesn’t have a liner, by now you’ve discovered you’re tired of hearing all your stuff rattling around. Your saddlebags are like the trunk of a car. How many car trunks have you seen that don’t have a carpet liner? “None” is probably the answer. Liners protect your more valuable items, like a cell phone, and they keep the noise to a minimum. The bottom line is that you need liners for your bottoms.
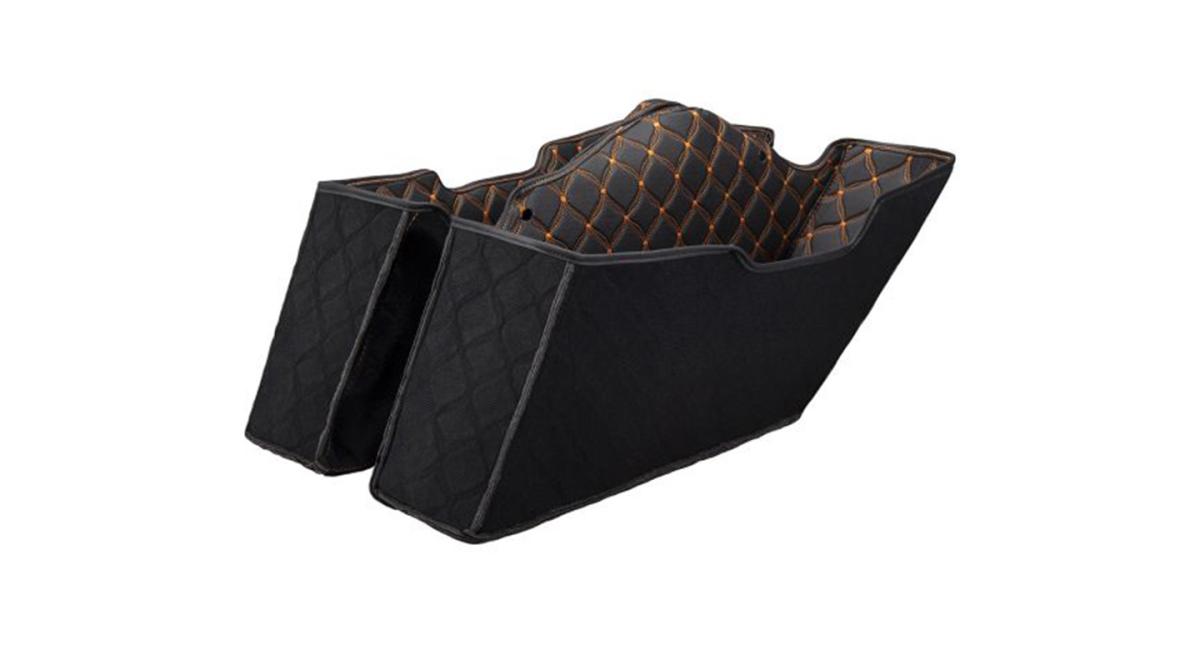
But it can be challenging to buy liners that fit perfectly. Advanblack has you covered, literally. We have saddlebag liners to fit most every saddlebag we sell. They come in dual cut, single cut, and no cutout to accommodate what you have and even have holes to fit around the mounting bolts. They are all thick, waterproof, high-quality synthetic leather liners, and they fit the inner contours of your saddlebag like a hand in a glove. Please note that if you have speakers mounted in your saddlebags, these liners will not fit.
Advanblack liners come with a beautiful, stitched pattern that covers the entire liner with threading. Some other liners only have partial stitching, which is why Advanblack is the only way to go for Harley Davidson saddlebag liners.
For installation, our Harley saddlebag liners come with durable, sticky Velcro tape that is used to keep the saddlebag in place. You may be thinking “more is better” when it comes to the Velcro, and that’s just not the case. Here are some tips to ensure your installation is easy and hassle-free.
Tips for installing liners for Harley Saddlebags
Installing saddlebag liners is one of the easier installs, but you have to be patient and take your time with fitting the liner in the bag. You don’t have to take the saddlebag off or remove anything. You can even keep the lid on. It is a little easier with the lid off, but it’s not necessary.
The first thing you need to do is clean the interior of your saddlebags well to ensure the Velcro tape sticks to the plastic sides of the saddlebag. This tape is super adhesive on one side and super “Velcro-y” on the other. The Velcro side sticks to the fabric of the liner like glue and will hold it in place. You do NOT need to use the entire roll of tape. You may need some more if you ever need to replace the liner or remove it for cleaning.
Start with taping the rim of the saddlebag. You’re going to run tape around the entire rim, but don’t try and do this with one strip! Cut finger-long strips and go around the rim. You’ll need to fit it around some of the hardware. Also do not put the tape to the edge. Drop it down about ¾”. Once you have the rim tapped up, you can choose how much more tape you want to use. These liners fit perfectly, and since gravity is on your side, they’ll fit and stay in place without having to use any more Velcro. But we recommend having a small strip or two on each side and on the bottom to keep it in place. If you do use a lot of tape, it makes it more difficult to install the liner as well as removing it for cleaning, which you’re going to want to do.
Once the Velcro tape is in place, it’s time to install the liner. Put the liner loosely in the saddlebag and work the rim first. Start with one of the corners and go around the rim with the liner, pressing it onto the Velcro as you go. Yes, it’s going to stick in places you don’t want it to. Just be patient and methodical. Work it slowly into the bag, pushing it down to the bottom. Use your fingers to press it into the corners. You’ll discover that the custom stitching of the Advanblack liner helps fit it right into the bottom corners of your saddlebags. It takes a little bit of time to work the saddlebag liner in place, but once it’s in, you’ll love the look. And you’ll love not hearing your personal items banging around in an unlined saddlebag.
Why stop with liners?
If you’re going to put liners in your saddlebags, you should consider other popular upgrades for saddlebags, such as color matched speaker lids. You can get them with either single or double 6”x9” cutouts or normal lids without the cutouts. Any speaker lid from Advanblack is color matched guaranteed and comes pre-drilled to fit perfectly.
Now if you’ve got speakers built into the bag and you really want liners, we have the perfect option. Our stretched saddlebag bottoms will replace the OEM bags. Then with new speaker lids, you can upgrade your entire sound system and get liners.
Check out all our liners here. And if you run into trouble, Steve the service technician shows you how to install liners either the 4.5” stretched saddlebag or ’09-’12 stretched saddlebag.